HVAC installation is not just throwing a unit in a corner and hoping it keeps your house comfy. It’s a process, and if it’s done wrong, you’re looking at headaches, high energy bills, and rooms that are either freezing or sweating. But done right? It’s smooth, efficient, and your home stays comfortable all year.
This is a complete guide from the first home inspection to the moment your system starts humming perfectly. Think of it as a walk-through with someone who’s done this hundreds of times.
Step 1: The First Look – Home Assessment
Before anything happens, your home gets a thorough check. This isn’t a 5-minute walk-around. Professionals measure rooms, inspect ducts, check airflow, and look at electrical circuits. Why? Because if this step is skipped, your new system might struggle from day one.
Here’s what happens:
- Ductwork and vents are checked for leaks or blockages.
- The house’s square footage is measured. Too small a system won’t cool or heat properly.
- Too big? It cycles on and off, wasting energy.
- Electrical circuits are tested to prevent future hazards.
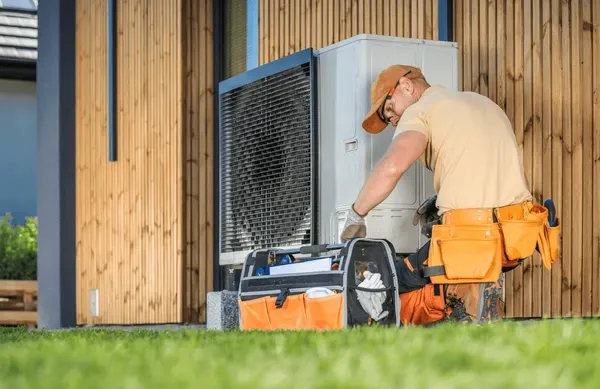
- The best spots for central air installation or a mini split AC system are chosen to maximize efficiency.
Do not skip this step. It’s the foundation for everything that follows.
Step 2: Picking the Right System
Next, it’s decision time. Which system do you need? There are basically three:
| System | Why You’d Pick It | Best For |
| Central AC | Cool the entire home evenly | Whole-house comfort |
| Mini Split AC | Energy-efficient, no ducts needed, control individual rooms | Rooms without ducts or additions |
| Traditional HVAC | Combines heating and cooling in one unit | Whole-home solution, long-term durability |
Here’s the thing, size matters! Too small, your house won’t reach the right temperature. Too big, it cycles too often, wasting energy and money. Picking the right system makes all the difference.
Step 3: Preparing for Installation
Now, preparation might not seem thrilling, but it’s crucial. This step prevents delays, mistakes, and frustration.
- Clear the area around the old system or where the new unit will go.
- Make sure the air conditioner unit has arrived and matches your order.
- Check that electrical and gas lines are ready.
- See if your home warranty covers HVAC installation or parts—it could save you money.
Do this, and you’re already ahead.
Step 4: Removing the Old System
If you’re replacing an existing system, it must be removed carefully. Don’t rush it. A proper removal sets the stage for smooth hvac installation.
- Disconnect refrigerant lines safely.
- Remove old ducts or vents if needed.
- Dispose of the old system responsibly.
Messing this up can cause leaks, airflow problems, or damage that affects the new unit.
Step 5: Installing the New System
Now comes the main event. The system goes in, connected and ready for action:
- Hook up the air conditioner to ducts or place the mini split AC system units.
- Install central air setup units in attics, basements, or rooftops.
- Connect refrigerant lines, drainage, and electricity.
- Level and secure the system so it works efficiently.
Professional installation here is key. A small mistake could mean uneven cooling, leaks, or early breakdowns.
Step 6: Testing and Calibration
Once installed, the system gets a test run. This is where most people relax too early. Don’t. Testing is crucial.
- Check airflow and temperature in every room.
- Verify refrigerant levels are correct.
- Ensure all electricity connections are stable.
- Listen for unusual noises or vibrations.
Only after testing can you be sure your air conditioner installation is working perfectly.
Step 7: Maintenance Tips
Even a brand-new system needs care. Follow a simple home HVAC maintenance routine to keep it running efficiently:
- Replace filters regularly.
- Clean vents, coils, and ducts to prevent blockages.
- Check thermostat settings for proper operation.
- Schedule cooling maintenance before summer and heating checks before winter.
Ignore maintenance, and your AC unit not working will leave you sweating in the heat.
Step 8: Optional Upgrades
After installation, a few upgrades can make life easier and improve efficiency:
- Smart thermostats for automated temperature control.
- Air purifiers or dehumidifiers for better indoor air quality.
- Zoning systems to control individual rooms.
- Energy-efficient components that save on bills.
Not mandatory, but worth it for comfort and savings.
Step 9: Common Problems
Even a new system can run into trouble. Watch out for:
- The AC stopped working suddenly.
- Uneven cooling or heating.
- Strange noises or smells.
- Time for an air conditioner change due to age or damage.
Knowing who to call to fix furnace or AC problems is essential. Certified HVAC professionals can restore comfort fast.
Step 10: Regular Maintenance
Maintenance is the secret to a long-lasting system. Follow a simple HVAC maintenance guide:
- Twice-yearly professional inspections.
- Seasonal cleaning of ducts, vents, and filters.
- Monitor energy usage and system performance.
- Keep records for warranties or service visits.
This ensures your hvac installation stays efficient for years.
Mini Split Systems: What’s Different
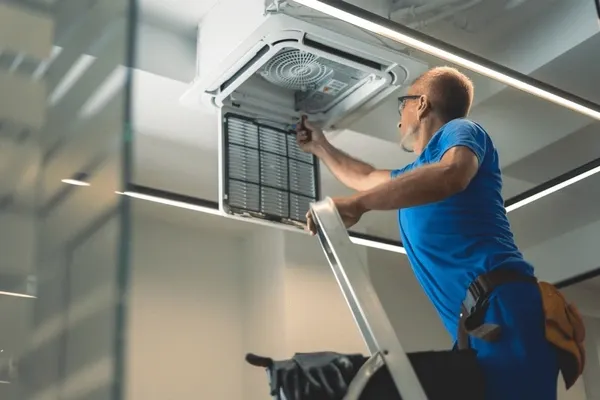
A mini split AC system works differently than traditional central AC. Key points:
- Indoor and outdoor unit placement matters for efficiency.
- Proper air conditioner connection prevents leaks.
- Refrigerant lines must be installed correctly.
For how to install a mini split system, professional guidance is strongly recommended. DIY mistakes can reduce efficiency and even damage the system.
Common Mistakes to Avoid
- Wrong system size.
- Ignoring duct inspections.
- DIY installation instead of using air conditioner installation services.
- Skipping home HVAC maintenance after installation.
- Forgetting to test and calibrate after setup.
Avoiding these mistakes ensures your system works perfectly from day one.
Cost Considerations
HVAC installation costs vary depending on:
- System type: central AC, mini split, or traditional HVAC.
- Home size and complexity.
- Professional installation fees.
- Optional upgrades like smart thermostats or zoning systems.
Spending a bit more upfront for professional installation is worth it. A properly installed system lasts longer, runs efficiently, and keeps energy bills in check.
Signs It’s Time for a Replacement
Even the best systems wear out. Look for:
- Frequent breakdowns.
- Rising energy bills.
- Rooms not cooling or heating properly.
- The need for an air conditioner changed.
Catching issues early lets homeowners plan hvac installation before comfort is compromised.
Conclusion:
Before anything gets installed, a technician will come to your home. They’re not just giving a quick look-around – they’re playing detective with your house. Then comes the careful removal of your old equipment – they handle all the disconnecting and safe disposal.
Frequently Asked Questions
How long does an HVAC system last?
15–20 years with proper home HVAC maintenance.
Does home warranty cover HVAC installation?
Some plans cover parts but not full hvac installation.
How often should HVAC maintenance happen?
Twice a year, usually before summer and winter.
Can homeowners install a mini split system?
Professional installation is recommended for proper air conditioner connection.
What are signs an AC isn’t working?
Uneven cooling, high bills, strange noises, or a complete AC stopped working.
How long does central air installation take?
1–3 days depending on home size and system complexity.
Who should be called for furnace or AC problems?
Certified technicians offering air conditioner installation services.
What’s included in HVAC installation services?
Assessment, unit setup, central ac setup, air conditioner connection, testing, and maintenance guidance.
What are simple maintenance tips for homeowners?
Change filters, clean ducts and vents, check thermostat, schedule seasonal inspections.
How to improve energy efficiency after installation?
Install smart thermostats, maintain the system with home HVAC maintenance, and consider energy-efficient upgrades.